I am sharing some sign painting and lettering tips here, a very rustic easy style. It might be a surprise how easy it really is.
Please go buy yourself a few and
some more for GIFTIES!
I hand paint each sign one at a time, I do a mass production on the designs, then I come back and do the lettering/quotes
as I get orders.
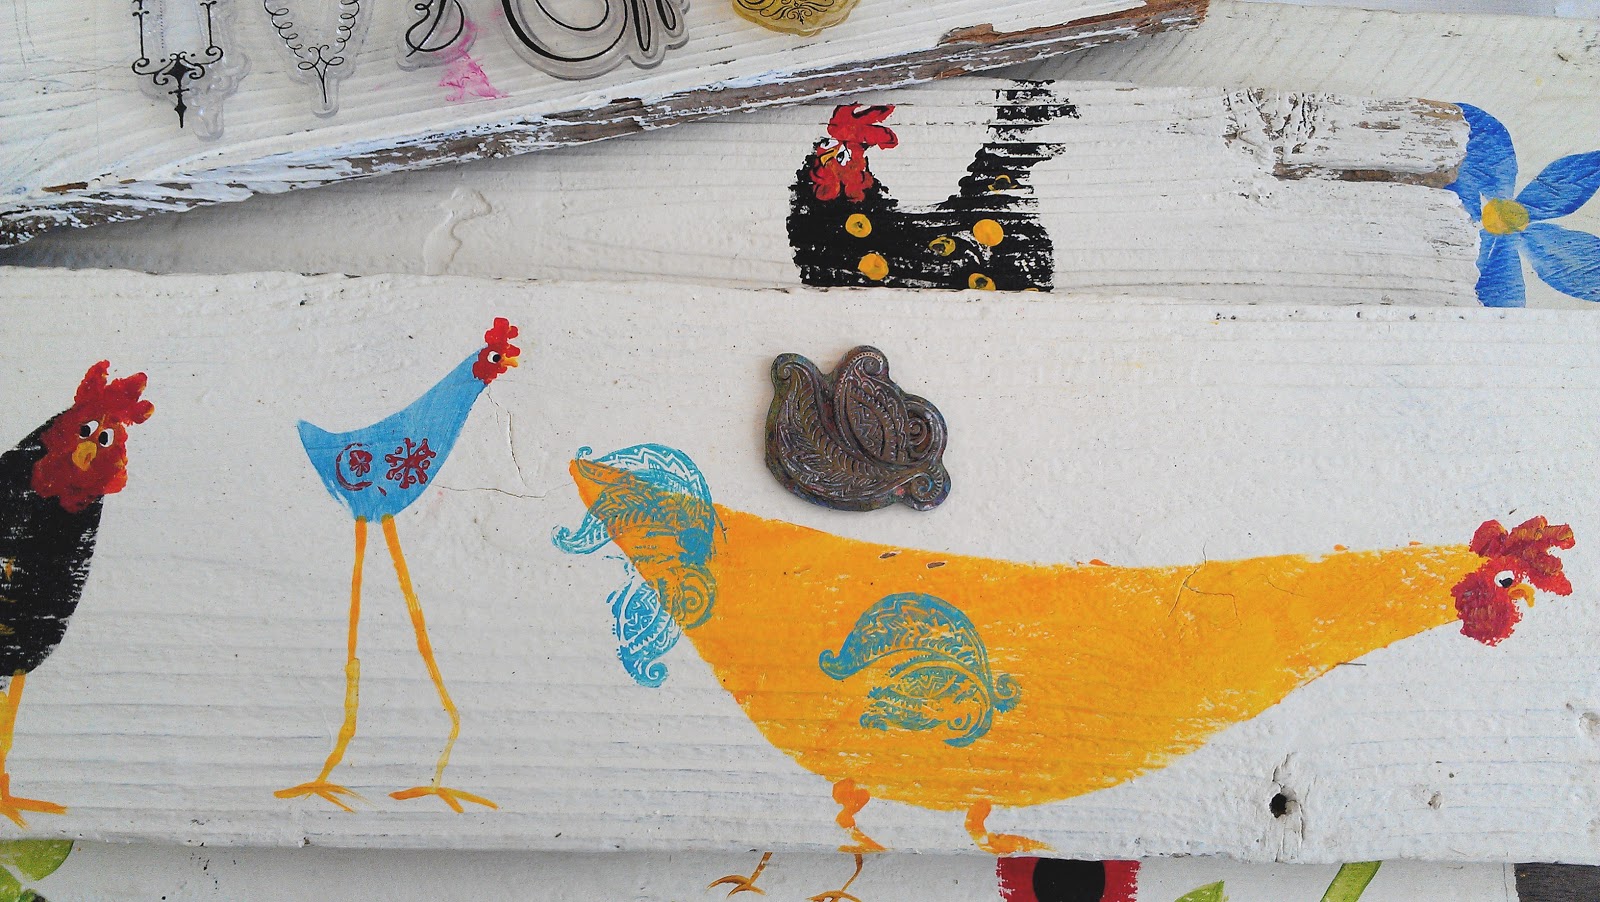
After painting my unique chickens or
designs on the basecoated boards
(I love Walmart brand Country White Flat interior house paint)
I add embellishments with clear acrylic stamps and other objects.
Notice the rubber stamp in the photo below?
It's hard to see the stamp because it has paint all over it.
Below is a photo of the clear acrylic stamps that I have used, by Inkadinkado.
Google that and you'll find them for sale everywhere. I love to use the acrylic stamps,
which I believe are intended to use with inks.
I don't always follow the rules are even try to see what the rules are. If it works, I do it. I use the stamps with paint, then I quickly drop the stamp into a container of water until I am ready to wash the paint off.
Some paint will stain the stamps, and after hundreds of times of use, you may need to purchase new stamps.
There is a clear block that can be used to lay out your stamps and press on wherever you want them, but I don't use the block for most projects, I just brush on the paint and use my fingers to press on the paint. It's great when you are doing a curved surface..like this coffee pot below:
I do many different styles of designs on my Signage. The Sky is the limit!
I do a fun free style rough painting style, which I think is a trendy look. Not so perfect, you know? I first made my own stencil,but after a few, it's easy to just slap these on sort of hit and miss. I think it's a very unique and a style that is so easy it looks hard.
This style can be used with your own designs.
Just paint and have fun!
You don't have to have a pattern!
Please don't Copy mine, it's so easy to come up with something UNIQUE if you try.
And You'll be So Proud of yourself!
BE ORiGINAL!
Have fun and experiment with color layers!
Now on to the lettering!
You can see I scribbled the quote on paper and laid it in front to use as a guide, so I would be able to space the lettering and have room. Sometimes you have to wipe it all off and re-do it if you mess up. I have messed up plenty, and I have misspelled plenty. It is very easy to do that!
So, this is why after I have painted the designs and embellishments, I SEAL it before I do the lettering! Wow, what a wonderful tip!
I seal the painted sign with water based Behr brand faux finish.
If it works for wall painting,
why not for signs? I love the way it looks.
If I want to make the sign durable for Outdoors,
I use Minwax brand Lacquer.
It dries really fast and gives the piece a wonderful flat finish. JUST do it with ventilation, outdoors is best! It's very durable! I use it for all furniture painting now,
versus Minwax Polyacryic.
When the glaze is dry, you are ready to do the lettering. I never throw away any of my old brushes. The ones that work better for rustic sign lettering are the ones that are stiff, with a tiny bit of flexibility in the tip.
It's way easier to control the lettering,
it works almost like a magic marker.
See pics below.
The size of the brush determines the size of the lettering.
The one on the right is the perfect size for
my signs pictured here.
That's it, just practice til you get it right. It's a never fail lettering technique,
Oh and that you use a good acrylic black to do it. It needs to be a good opaque black,
I have used Ceramcoat black, and Folk Art black, and Golden brand black.
Apple Barrel is too thin.
Happy Sign Painting!